It was perhaps Cleopatra, if by Cleopatra we mean Elizabeth Taylor, which we do, who first made famous the sultry “smoky eye.” It’s dark, typically gray or black, and is definitely not a look to be worn with a sundress. It’s a heavy, 18-and-over eye, suitable for parties, clubs and fashion shoots, if you’re into those.
Indeed, there is nary a female celebrity who hasn’t worn it in public at least once, and women have been scurrying to copy the sexy style for years. It’s a multi-step look that does require some know-how, but there’s no reason why you can’t do it at home, especially with the surge in “smoky-eye kits” on store shelves.
You don’t even need one of those, though. You may already have what you need in your makeup kit, and if not you can equip yourself for less than $30.
We’ll start there, with the supplies you’ll need for the smoky eye.
While the look is typically done in gray or black, we’ll go with the gray version here, which is a bit less dramatic (read: more wearable).
Step 1: Gathering Your Supplies
The smoky eye does have several components, but you don’t need to go out and spend 100 bucks. You may want to start with the most basic supplies to make sure you like the look before building up your smoky-eye kit (pre-bundled kits are available for purchase, too, if you’re not a mix and match kind of shopper).
At the minimum, you’ll need:
- Eye-makeup primer (undereye concealer works fine, too)
- Eyeliner, pencil-type preferred, in dark gray or black
- Eye shadows in four tones: light gray, medium gray, dark gray, sheer neutral
- Applicators (the kind that comes with shadows is fine)
- Black mascara
Optional:
- Eye-makeup smudger (sponge or cotton swab)
- Brushes: large, medium and crease
- Shimmer powder
Now that you’ve got what you need, let’s start building the smoky eye.
Step 2: Prepping Your Canvas
You’ll begin by priming your eye to receive (and hold) the makeup you’ll be applying. This will hold the shadow in place as well as provide an evening base that will help smooth everything out.
You can use eye shadow primer for this step, which is a nude, liquidy, foundationlike makeup. If you don’t have primer, you can also use undereye concealer or the same foundation you use all over your face.
Spread a thin, even layer over your entire lid, from lash line to brow. Don’t forget to use your undereye concealer under your eyes at this point, too, if that’s part of your routine.
With your eyes primed, you’ll be reaching for your eyeliner.
Step 3: Drawing the Line
Take a look at your black or dark gray liner: Is it dull? If so, you’ll want to sharpen it so you can fully control the line.
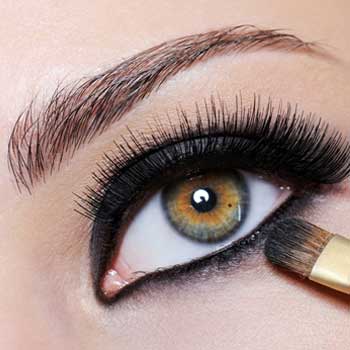
Start by lining your upper lid, as close to the lash line as possible, from inner eye to outer. Don’t go past the outer corner of your eye.
Next, move to the lower lash line, and draw from about mid-line to outer corner. Again, stay super-close to the lashes. One way to do this is to dot the liner in between the lashes and then connect the line by smudging it, either with your sponge, your cotton swab or your finger.
If you have small eyes, don’t line the inner half of the lower lid. If your eyes are large, you can complete the lower line, but it’s not necessary.
Lightly smudge both upper and lower lines to soften them. Then take out your shadows.
Step 4: Playing with Shadows
Your three pigmented shadows are the most important part of the smoky eye. You’ll begin with the lightest shade, sweeping it over the entire eyelid, all the way up to the brow line.
Next, with your medium gray, cover just the lid, from lash line to crease. Then take your darkest gray and work it into your crease. This will give your eye added depth, since darker colors tend to recede.
At each step, be sure to blend so there are no crisp color changes.
Now apply your sheer, neutral shade either only to your brow or to the entire lid. Applying it all over will further even out the look.
Finally, you’ll apply the shimmery shade to your brow if you want some sparkle.
You now have a smoldering “smoky” eye. All that’s left are the finishing touches.
Step 5: Final Flourishes
With a heavy eye, finishing touches can really make or break the look. We’re primarily talking about three things here: lashes, cheeks and lips.
Two coats of mascara will finish your eyes. Be sure not to clump.
For cheeks and lips, you want to downplay. Your eyes are the standout feature here. That means a neutral blush that blends right into your skin tone or, better yet, a bronzer that highlights your bone structure without adding pigment.
Lips should be subtle — a light, neutral shade works well with a smoky eye, as does a clear, nude or light pink gloss. You can line your lips with a neutral color if you’re a lip-line fan, but it’s not strictly necessary.
Your face is now ready to greet the world. Just don’t go throw on a cotton sundress with your night-time eyes. An LBD or some skinny jeans with heels are a much better match.
Related Articles
- Carmindy’s Makeup Tips
- Summer Makeup Essentials
- Kristofer Buckle’s Eye Makeup Tips
- Ultimate Eye Makeup Quiz
More Great Links
Sources
- 7 Tips for Creating a Perfect Smoky Eye Look. AllWomensTalk.http://allwomenstalk.com/tips-on-smokey-eye-look/
- Get The Celebrity Look: Smoky Eyes. Marie Claire.http://www.marieclaire.com/hair-beauty/trends/articles/smoky-eyes
- How to Create a Smoky Eye. BellaSugar.http://www.bellasugar.com/Smoky-eyes-smokey-eyes-How-create-smoky-eye-tutorial-53781
- Smoky Eye Makeup. CoverGirl.http://www.covergirl.com/makeup-tips/eye-makeup-tips/smoky-eye-makeup/